Screen recording on a Mac is incredibly useful, whether you’re creating tutorials, saving a video call, or capturing gameplay. But many people struggle to figure out how to include audio in their recordings. If you’re one of them, don’t worry, we’ve got you covered! In this guide, we’ll walk you through the easiest ways for how to screen record on a Mac with audio, using built-in tools and third-party apps.
Why Would You Need to Screen Record with Audio?
Screen recording with audio is essential in many scenarios:
- Online Tutorials: Demonstrating how to use software or a website.
- Meetings & Lectures: Saving valuable discussions or educational sessions.
- Gaming Content: Capturing gameplay with commentary or background audio.
- Bug Reporting: Showing developers the exact issue with sound context.
Understanding how to include audio, whether from your Mac’s system or an external microphone, ensures a complete and professional recording.
How to Screen Record on Mac with Audio?
Method 1: Use the Built-In QuickTime Player
QuickTime Player comes pre-installed on all Macs and allows you to screen record. Here’s how to do it:
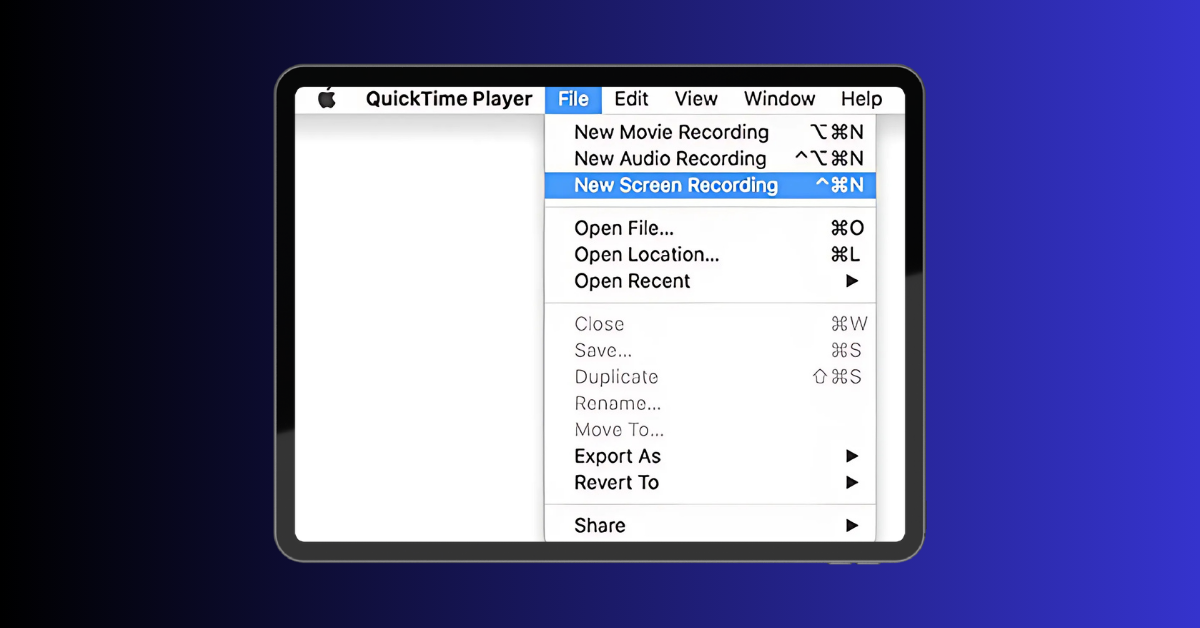
Open QuickTime Player
- Launch QuickTime Player from your Applications folder.
- Click on File in the top menu bar, then select New Screen Recording.
Adjust Recording Settings
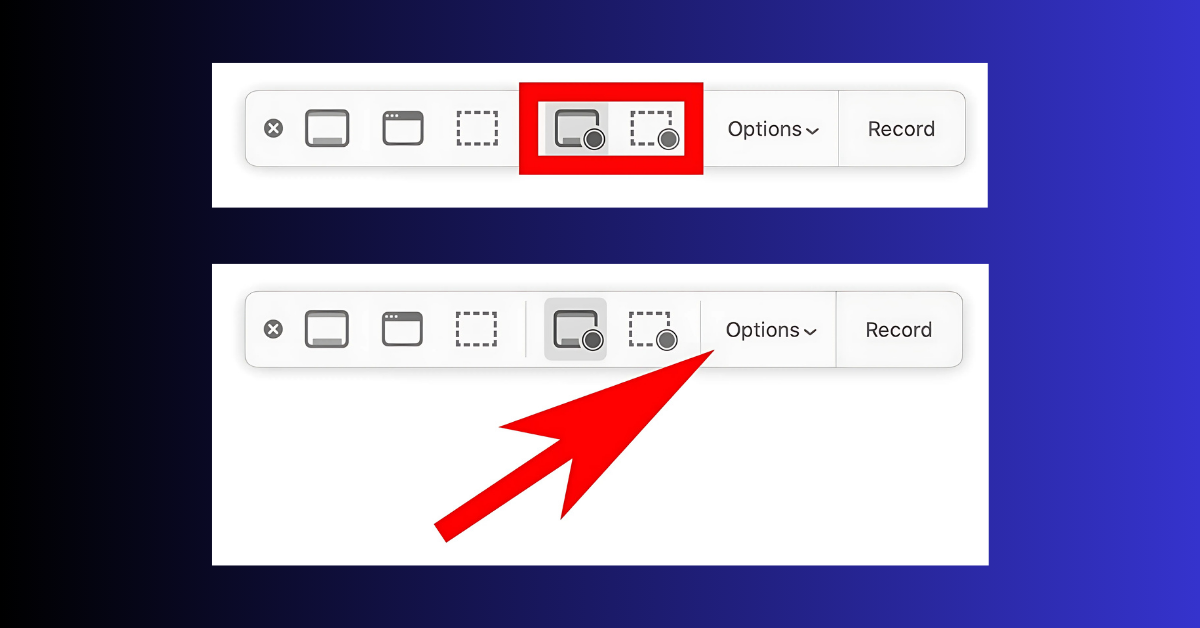
- A small screen recording toolbar will appear.
- Click the arrow next to the record button to access audio options.
- Select either:
- Internal Microphone: To capture your voice or external sounds.
- Built-in Output (Audio Capture): This is useful for capturing system sounds. (Requires setup—explained below.)

Start Recording
- Click the Record button.
- Select the area of the screen to record or choose to record the full screen.
- Once done, click the Stop button in the menu bar.
Save Your Recording
- After you stop recording, QuickTime will automatically open the file.
- Save it to your preferred location by clicking File > Save.
Note: By default, QuickTime Player doesn’t record system audio. To capture it, you’ll need a third-party app like BlackHole or Soundflower.
Method 2: Use Third-Party Apps for System Audio
To record both screen and system audio (e.g., internal sounds like YouTube videos or music), you’ll need additional tools. Here are some popular options:
Option 1: OBS Studio (Free)
OBS Studio is a powerful and free tool for screen recording and streaming.
- Download & Install OBS Studio: Go to OBS Studio’s website and follow the instructions.
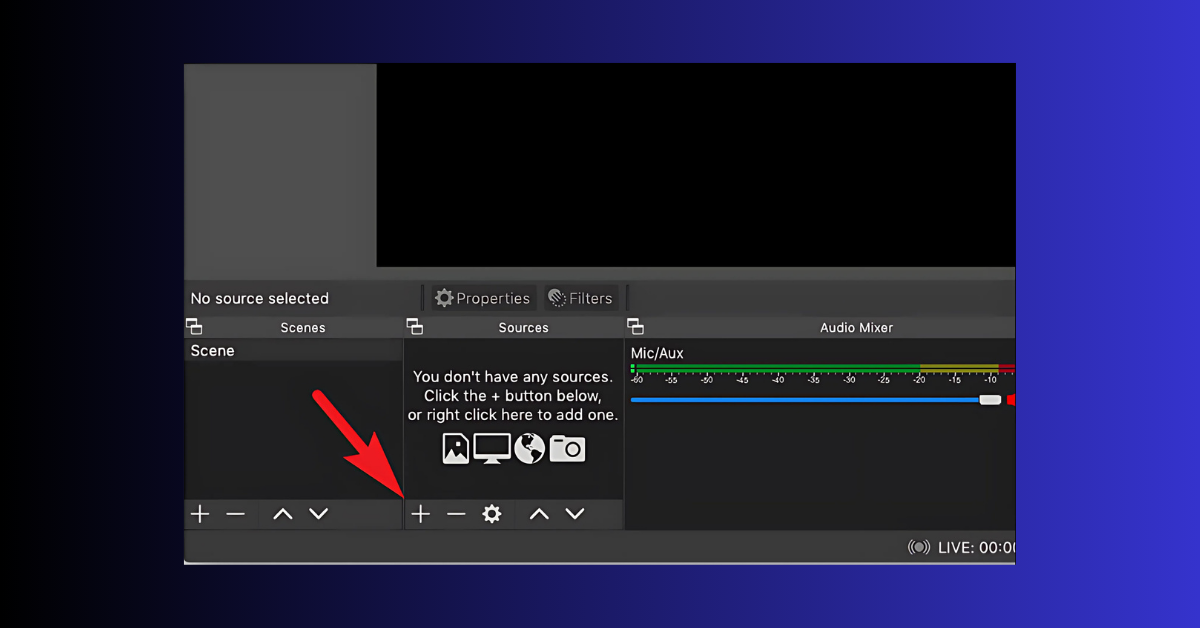
- Set Up Audio Sources:
- Open OBS, go to Settings, and add both a screen and audio source.
- You can capture internal sounds by installing BlackHole or iShowU Audio Capture.
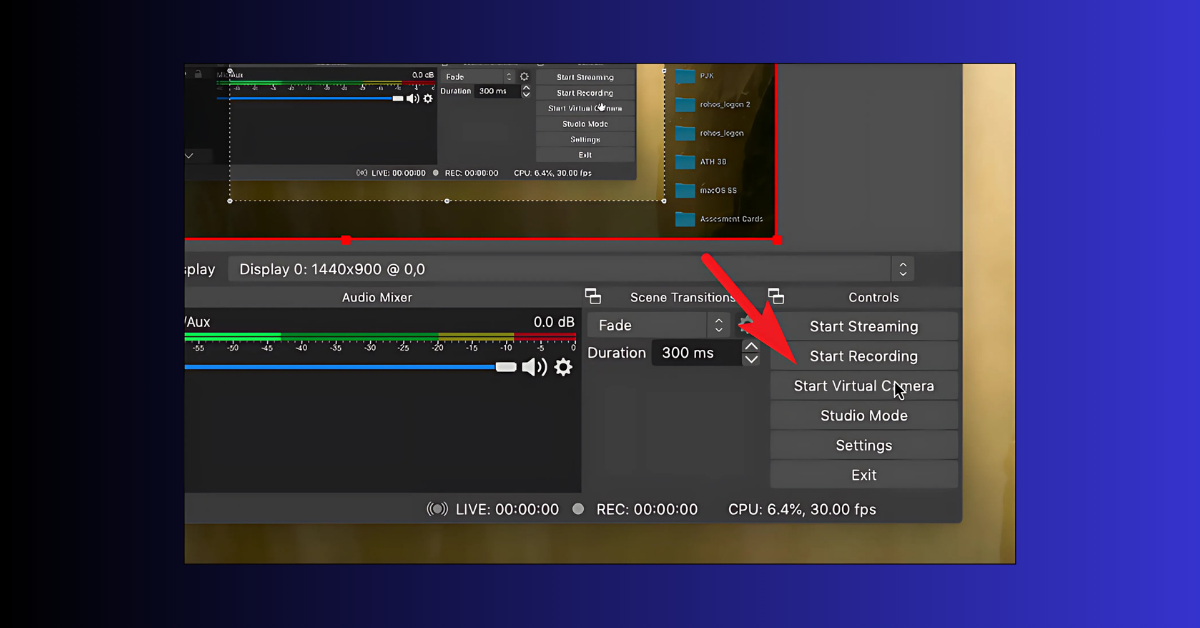
- Start Recording: Once configured, hit Start Recording.
Option 2: Camtasia (Paid)
Camtasia is user-friendly and ideal for professional video creators.
- Install and open Camtasia.
- Choose both screen and audio as your input sources.
- Record, edit, and export videos in high quality.
Test Audio Before Recording: Always do a quick test to ensure your microphone or system audio is working properly. Record a few seconds and play it back to check sound clarity and volume levels.
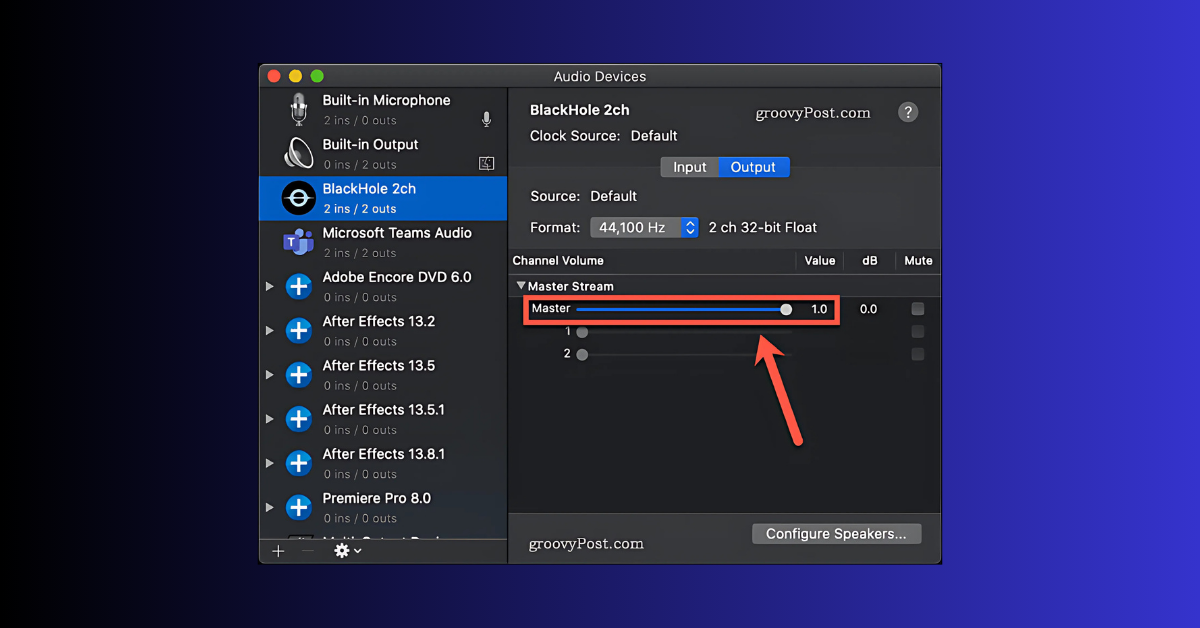
Setting Up System Audio with BlackHole
If you want to capture system audio with QuickTime or OBS, you’ll need to install an audio driver like BlackHole. Here’s how:
- Download BlackHole: Visit the official BlackHole website.
- Install It: Follow the installation steps.
- Configure Audio Settings:
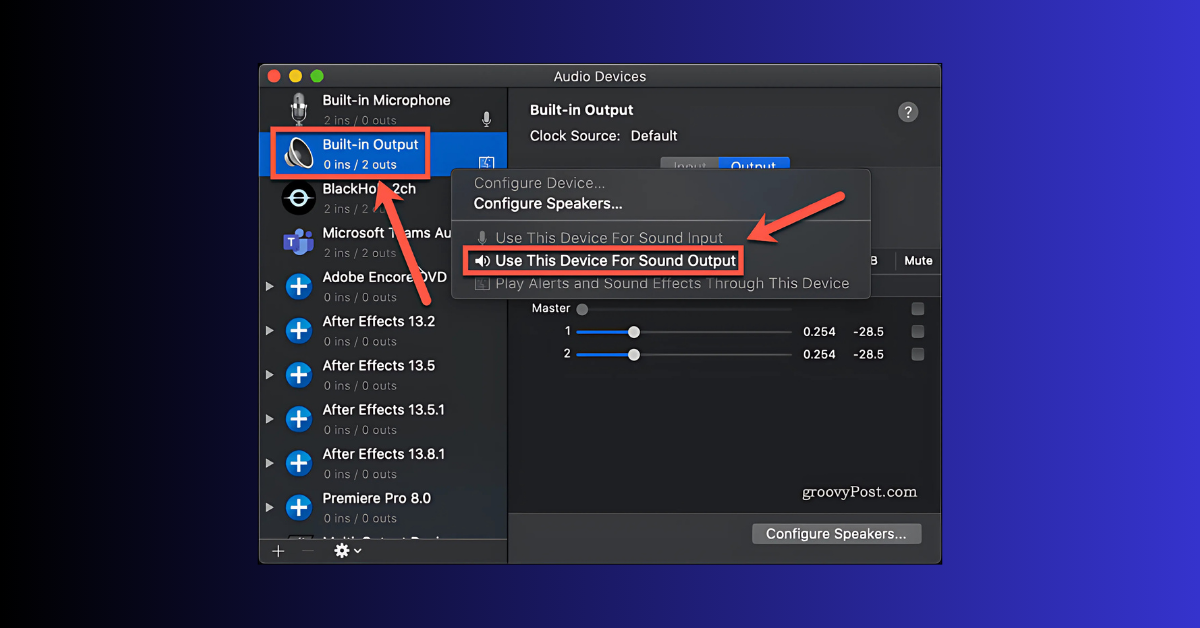
- Open System Preferences > Sound.
- Set BlackHole as the output device.
- Combine Microphone & System Audio: Use an app like Audio MIDI Setup (pre-installed on Mac) to create a multi-output device.
Now you’re ready to record system audio along with your screen!
Method 3: Use the Screenshot Toolbar (macOS Mojave or Later)
macOS Mojave and later versions include a built-in screenshot toolbar that can record your screen.
Steps to Record with Screenshot Toolbar:
- Press Shift + Command (⌘) + 5 to open the toolbar.
- Select either:
- Record Entire Screen
- Record Selected Portion
- To capture audio:
- Click Options and choose a microphone.
- If you want system audio, follow the BlackHole setup above.
- Click Record to start and Stop to finish.
Tips for High-Quality Screen Recording
- Check Audio Levels: Ensure the microphone or system audio volume isn’t too low or too high.
- Clear Background Noise: Use a quiet space or a noise-canceling microphone.
- Organize Your Screen: Close unnecessary apps or notifications before recording.
- Use Editing Tools: Trim or enhance your recording with apps like iMovie or Camtasia.
FAQs
Final Thoughts
Screen recording on a Mac with audio might seem tricky at first, but with the right tools and setup, it’s a breeze. Whether you stick to QuickTime Player, explore OBS Studio, or invest in Camtasia, you’ll find a solution that suits your needs.
Start recording today and make your tutorials, lectures, or presentations stand out! If you found this guide helpful, feel free to share it with others who might benefit.